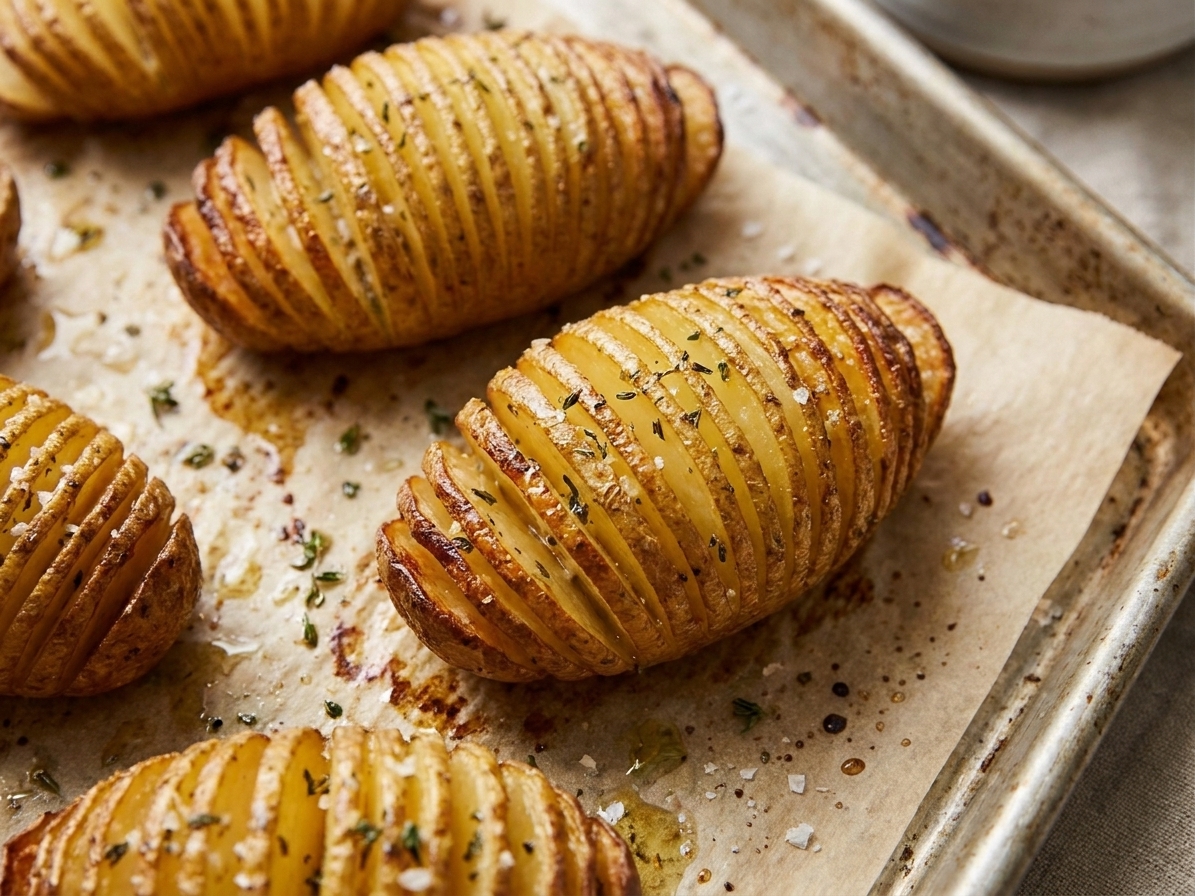

Hasselback potatoes are my favorite way to make a simple bag of potatoes feel a little fancy without turning dinner into a project. You get those dramatic, crispy “fans” around the edges, plus a creamy center that eats like a roast potato. The whole thing hinges on three small details: stopping your knife before you slice all the way through, basting often enough to season every layer, and salting at the right moment so the fans crisp instead of turning damp.

I learned to love hasselbacks while teaching basic knife skills, because they are secretly a great lesson in control. Once you know the “chopstick trick,” you can knock these out on a weeknight, even if you are tired and your cutting board is crowded.
This recipe is a sliced roast. Not a jacket potato, not smashed potatoes, and not roasted chunks. Think of it like an accordion-cut potato that gets basted into something buttery, deeply seasoned, and crackly at the edges.
How to get the cut right
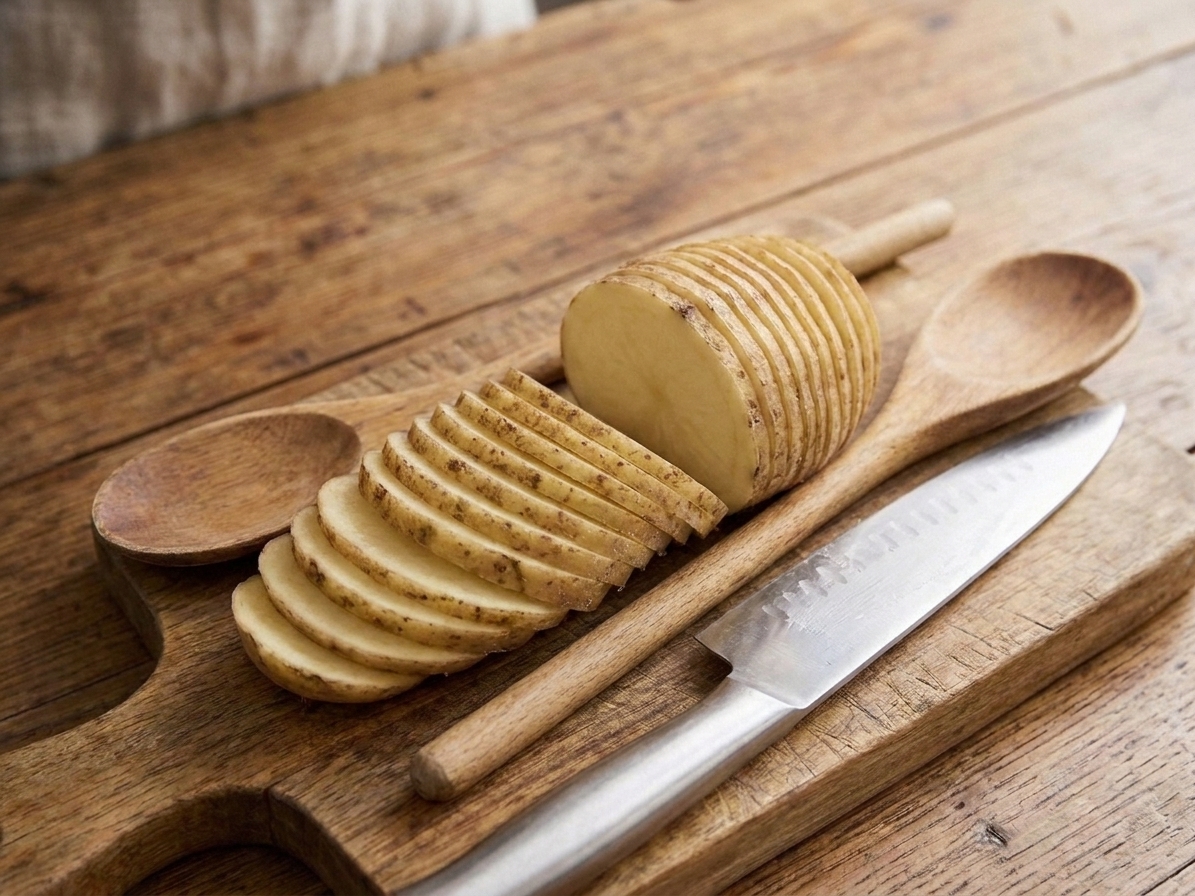
The goal is thin slices that stay attached at the base so the potato opens like a fan as it roasts.
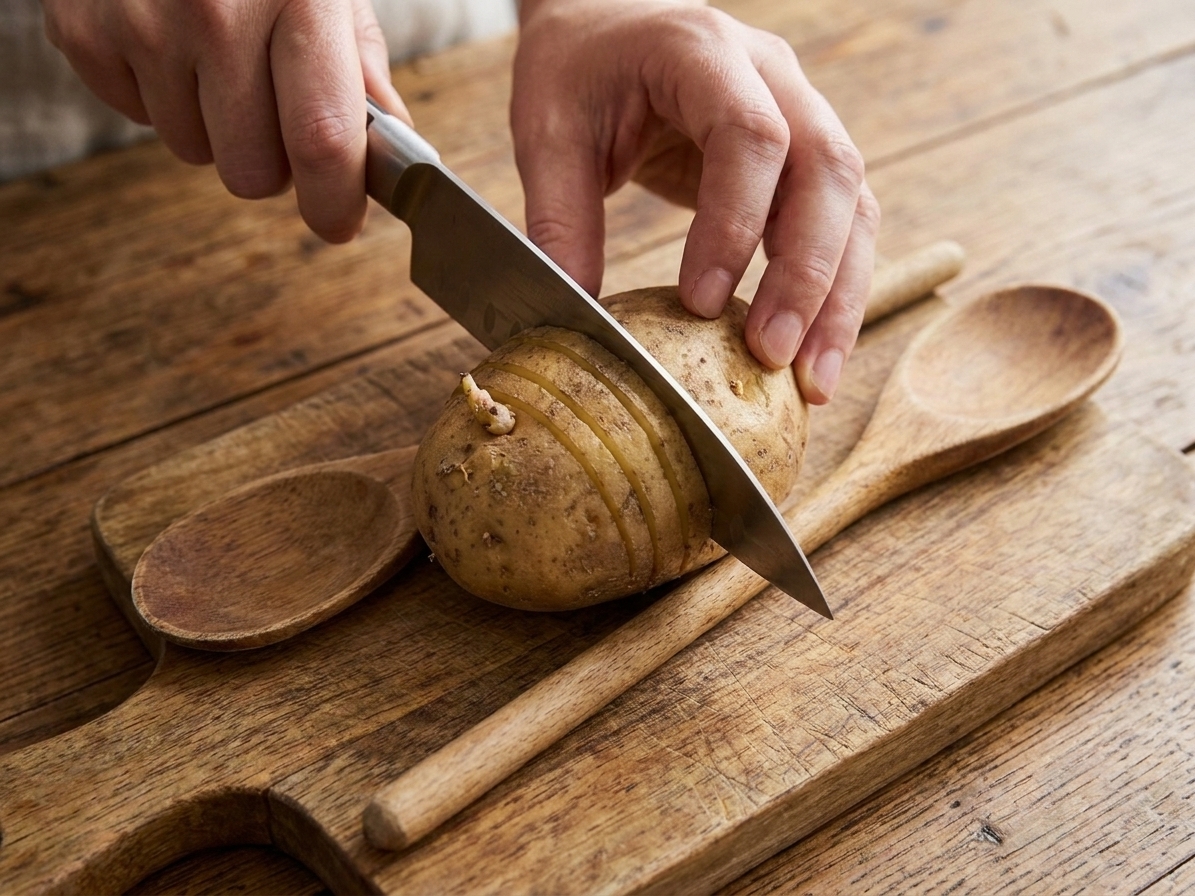
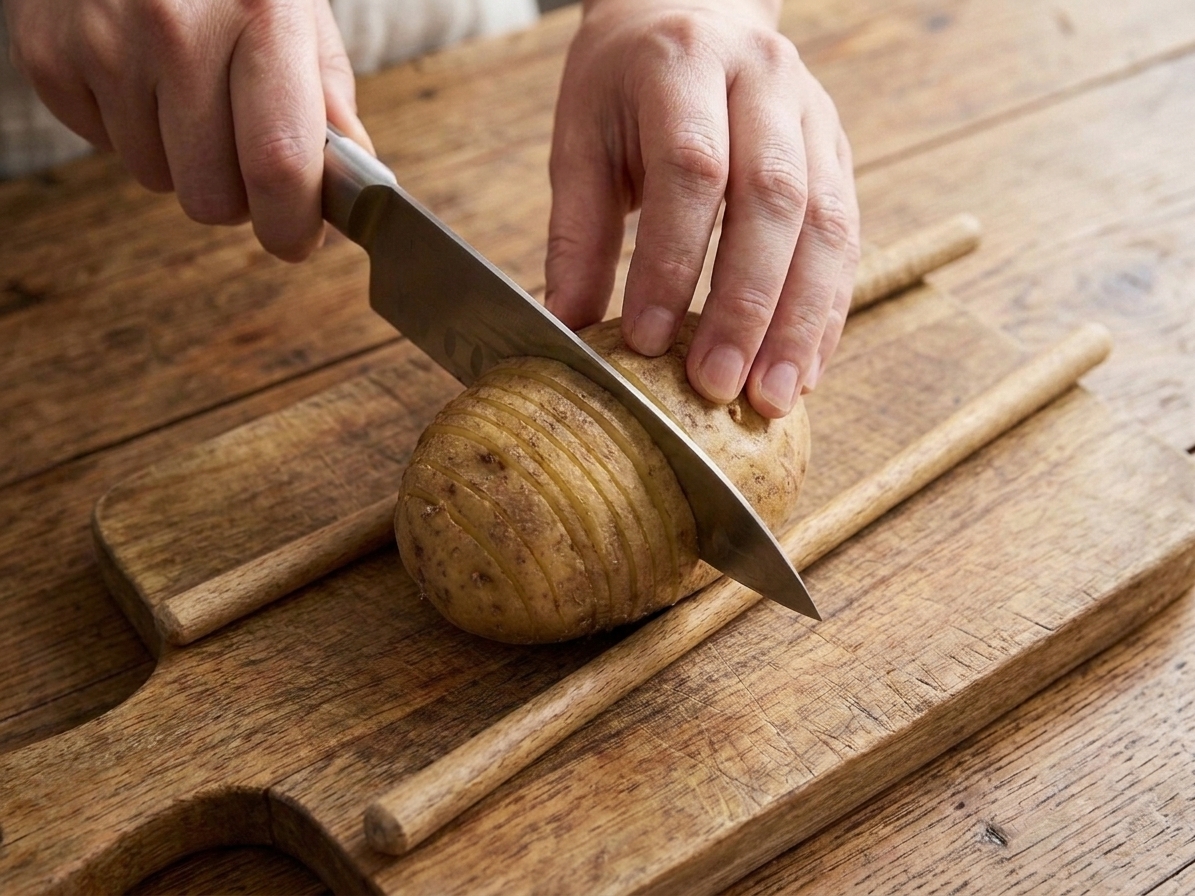
- Use two “stops”: Place the potato between two wooden spoon handles or chopsticks. Your knife hits the wood before it can cut all the way through.
- Slice on the long side: Set the potato flat so it does not roll. Slice crosswise into thin, even cuts.
- Aim for 1/8-inch slices: If you go thicker, the fans will not open much. If you go paper-thin, the edges can over-brown before the center turns tender.
Basting schedule (and why it matters)
Butter is not just flavor here. It is the tool that helps the slices separate, seasons the interior layers, and promotes crisp edges.
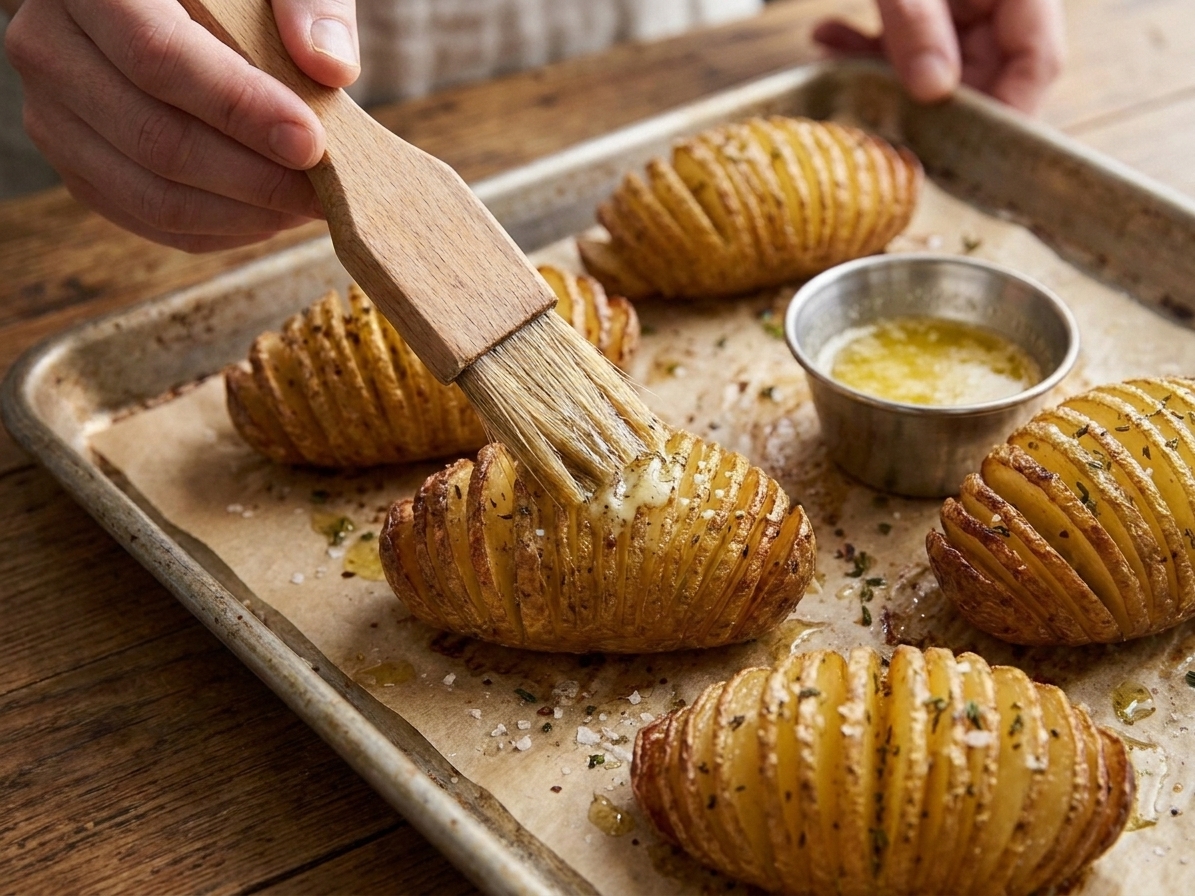
Plan to baste three times for the best results:
- Start: Brush melted butter on top and around the sides before the potatoes go into the oven.
- Mid-roast: After about 25 minutes, the slices begin to loosen. Baste again, letting butter drip into the cuts.
- Finish: Baste once more near the end to deepen browning and add shine.
If you only baste at the beginning, the outside can brown before the interior layers get seasoned. If you baste too constantly, you can cool the oven and slow crisping. Three intentional passes is the sweet spot.
When to salt so the fans get crisp
Salt draws moisture. That is great for flavor, but too much too early can encourage the potato surface to look wet, which slows browning.
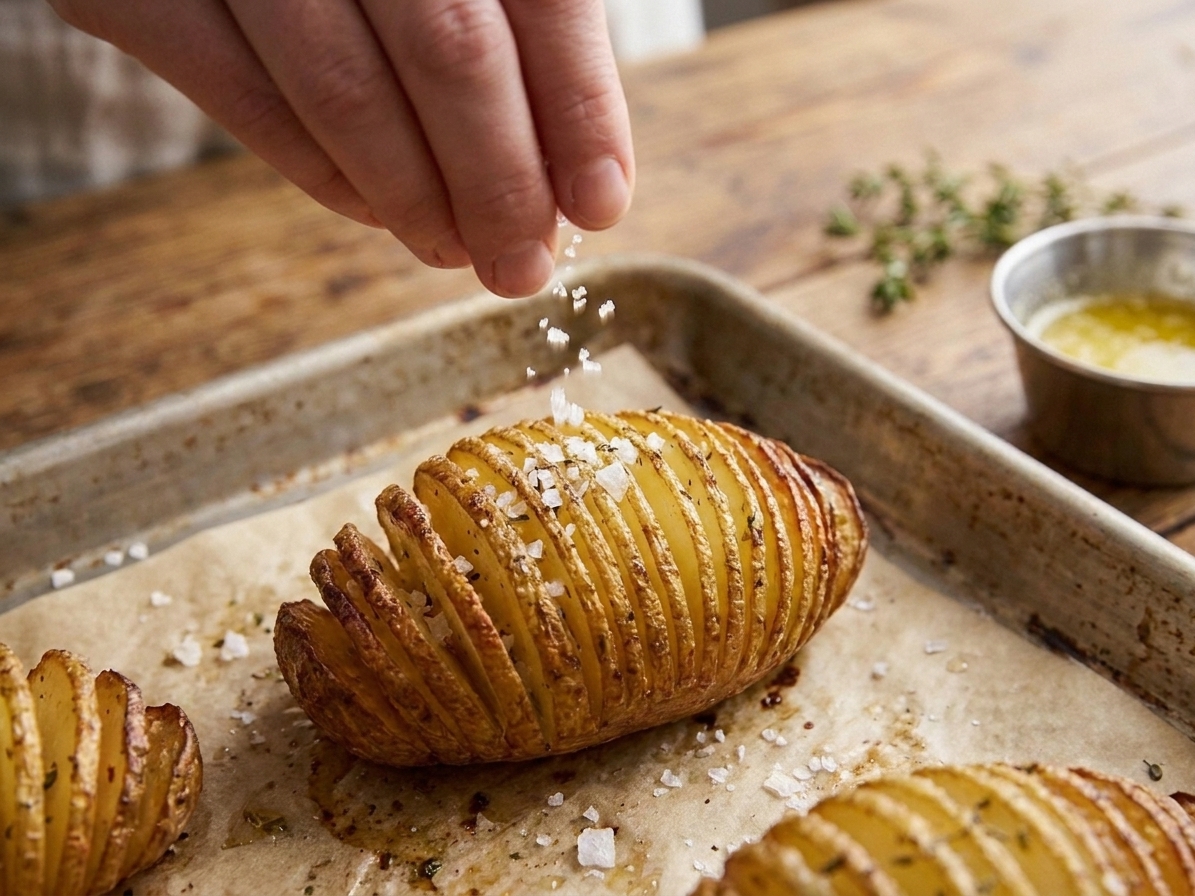
- Lightly salt at the start: Just enough to season the surface.
- Salt more once the fans open: Around the second basting, sprinkle salt from higher up so it falls between the slices instead of clumping on top.
- Finish with flaky salt if you want: This is optional, but it gives you that crisp, clean crunch at the very end.
Also, give the potatoes a little space on the pan. Crowding traps steam, and steam is the enemy of crisp fans.
Why this recipe works
- The spoon or chopstick “stops” prevent accidents: You get consistent slices without cutting through the base, so the potato stays intact and fans beautifully.
- Staged basting seasons every layer: The first butter coats the outside, then later basting slips between slices once they loosen, flavoring the interior cuts.
- Smart salting keeps the surface dry enough to crisp: A light early seasoning plus a later sprinkle avoids a damp, steamy top and helps the edges turn shatter-crisp.
- High heat does the crisping: Roasting hot encourages browning on the slice edges while the center turns tender.
Ingredient notes
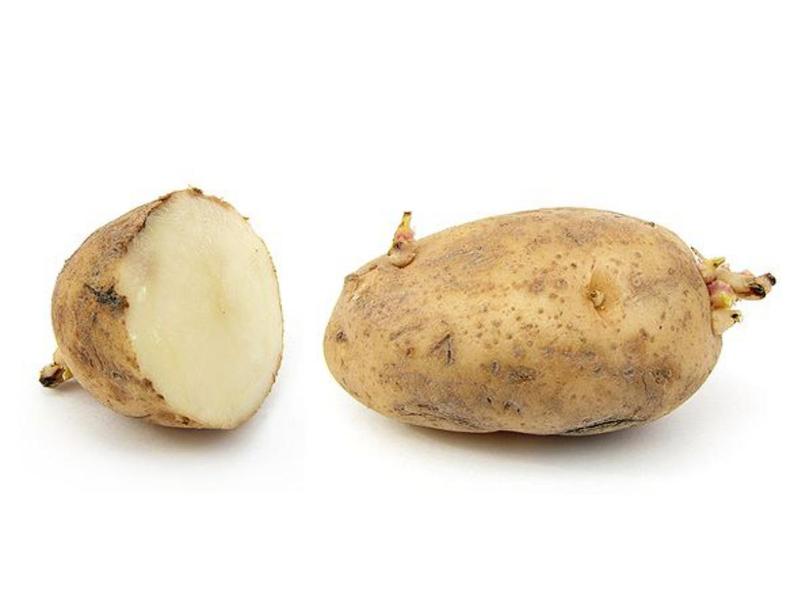
- Potatoes: Russets give you the crispiest edges and a fluffy interior. Yukon Golds work too and taste a little richer, but the edges are slightly less shattery.
- Butter: Use unsalted if you can, then control the salt timing yourself. If you only have salted butter, reduce added salt and taste at the end.
- Olive oil (optional but helpful): A small amount mixed into the butter can help prevent butter from browning too fast at higher heat.
- Garlic and herbs (optional): Add these later in the roast or mix them into the final basting butter so they do not burn.
Waste-saving note: If your potatoes are a little wrinkly but not green and not sprouting heavily, hasselbacks are a great use. Roasting revives their texture, and the butter carries the flavor.
Equipment you will need
- Chef’s knife (sharp makes cleaner slices)
- Cutting board
- 2 wooden spoons or 2 chopsticks (your slicing “stops”)
- Rimmed baking sheet or roasting pan
- Parchment paper (optional, for easier cleanup)
- Small saucepan or microwave-safe bowl (to melt butter)
- Pastry brush or spoon (for basting)
Pro tips
- Dry the potatoes well after washing: Water on the skin turns to steam. I pat them dry like I mean it.
- Microwave shortcut for faster tenderness: If your potatoes are very large, microwave them 2 to 4 minutes first, just to take the chill off. Cool 5 minutes before slicing so you do not burn your hands.
- Encourage the fans to open: After the first 25 minutes, use your brush to gently nudge slices apart while basting. Be gentle. You are coaxing, not prying.
- Add garlic later: Garlic in the first basting can scorch. Stir minced garlic into the final butter instead for sweet, mellow flavor.
- Season from above: When you salt mid-roast, sprinkle from 8 to 10 inches up so salt falls between slices instead of sitting on the top.
Substitutes that work
- No butter: Use olive oil. You will still get crisp edges, just a different flavor profile.
- Dairy-free: Use vegan butter or olive oil, and finish with a squeeze of lemon for brightness.
- No pastry brush: Spoon the butter over the potatoes slowly, aiming for the cuts.
- No parchment: Lightly oil the pan to reduce sticking and make cleanup easier.
Variations
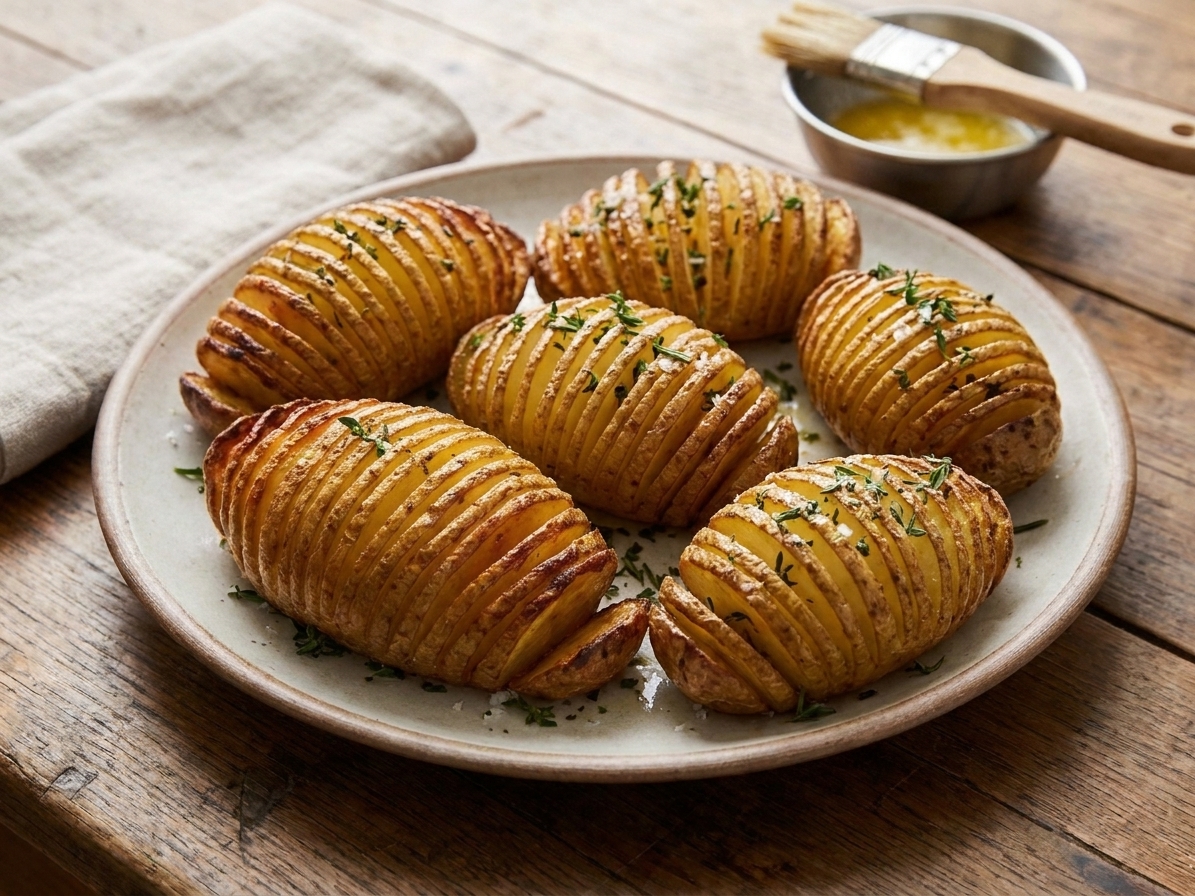
- Garlic-herb: Mix minced garlic and chopped rosemary or thyme into the final basting butter.
- Lemon pepper: Finish with lemon zest and cracked black pepper right after roasting.
- Parmesan crust: During the last 10 minutes, sprinkle finely grated Parmesan over the tops so it melts into the fans and turns lacy at the edges.
- Spicy: Add smoked paprika or a pinch of cayenne to the butter.
Serving ideas
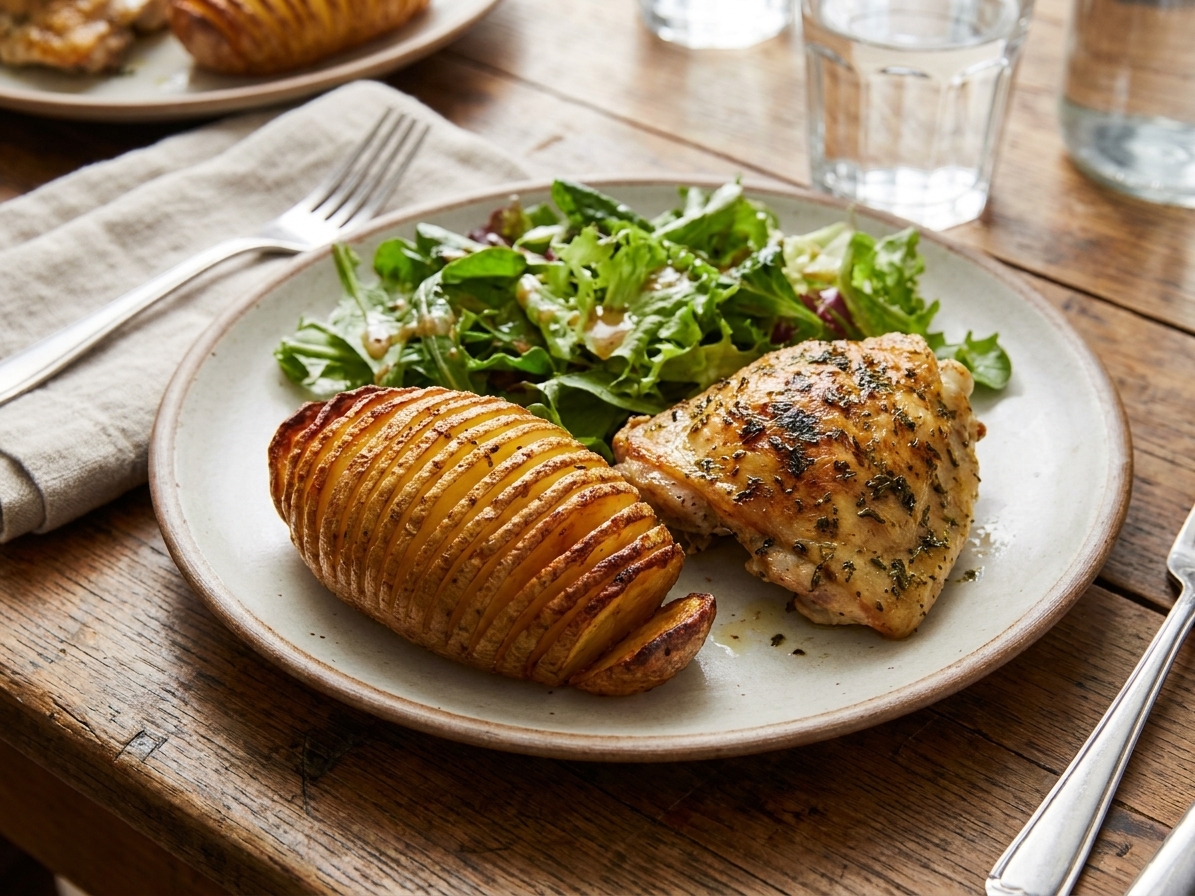
- Serve alongside roasted chicken, steak, or a simple baked salmon.
- Pair with a bright salad or something pickly to balance the richness. Think vinaigrette, quick pickles, or even a spoonful of sauerkraut.
- Make them the main event with a dollop of sour cream or Greek yogurt and a pile of chives.
- If you have leftover herb stems, finely chop and sprinkle them over the hot potatoes for a no-waste garnish.
Storage and reheating
- Refrigerate: Store leftover hasselback potatoes in an airtight container for up to 4 days.
- Reheat for crisp edges: Warm on a sheet pan at 400°F until hot and re-crisped, about 10 to 15 minutes. A toaster oven is perfect here.
- Avoid the microwave if you can: It heats the center but softens the fans. If you must microwave, do it briefly, then finish in a hot oven for a few minutes.
Common mistakes
- Cutting all the way through: Use chopsticks or spoon handles every time. Even confident knife folks slip when they are rushing.
- Salting heavily at the start: Too much early salt can pull moisture to the surface and slow crisping. Season lightly, then salt again once the fans open.
- Crowding the pan: Potatoes packed tightly trap steam and the edges stay pale. Give them breathing room.
- Adding garlic too early: Burnt garlic tastes bitter. Save it for the last basting.
- Skipping basting: The cuts need fat to separate and brown. If the tops look dry, the layers will not season evenly.
FAQ
How do I keep from slicing through the bottom?
Set the potato between two chopsticks or the handles of two wooden spoons, then slice down until your knife hits the wood. It is simple and extremely reliable.
How often should I baste hasselback potatoes?
Three times is ideal: before roasting, once the slices start to loosen (around the halfway point), and once near the end for deep browning and shine.
Why are my hasselback potatoes not crispy?
The most common culprits are crowding the pan (steam), not drying the potatoes well after washing, and heavy early salting. Also make sure your oven is fully preheated.
Do I need to boil the potatoes first?
No. Hasselbacks roast from raw. If your potatoes are very large and you are short on time, a brief microwave head start helps, but boiling is not necessary.
Can I prep hasselback potatoes ahead?
You can slice them a few hours ahead. Keep them submerged in cold water to prevent browning, then drain and dry very well before buttering and roasting. Moisture is the crisp killer here.
Hasselback Potatoes
Whole potatoes sliced into thin accordion cuts, brushed with butter, and roasted until the edges fan and crisp. Includes the easiest way to avoid cutting through, plus a simple basting and salting schedule for maximum crunch.
- Prep
- 15 minutes
- Cook
- 55 minutes
- Total
- 1 hour 10 minutes
- Yield
- 4 servings
Ingredients
- 4 medium russet potatoes (about 8 to 10 oz each)
- 4 tbsp unsalted butter, melted
- 1 tbsp olive oil (optional)
- 1 tsp kosher salt, divided
- 1/2 tsp freshly ground black pepper
- 1 to 2 tsp chopped fresh rosemary or thyme (optional)
- 1 small garlic clove, very finely minced (optional)
- Flaky salt, to finish (optional)
Instructions
- Preheat and prep the pan: Heat the oven to 425°F. Line a rimmed baking sheet with parchment (optional for easy cleanup).
- Wash and dry: Scrub the potatoes clean and pat them very dry.
- Make the hasselback cuts: Set one potato on a cutting board and nestle it between two wooden spoon handles or chopsticks. Slice crosswise into 1/8-inch cuts, letting the spoon handles stop your knife so the bottom stays intact. Repeat with the remaining potatoes.
- Season lightly and butter: Stir the melted butter with the olive oil (if using). Place the potatoes on the baking sheet. Brush the tops and sides with about 1/2 of the butter mixture. Sprinkle with about 1/2 tsp kosher salt and the black pepper.
- Roast, then baste: Roast for 25 minutes. Remove the pan and baste with about 1/3 of the remaining butter, aiming for the cuts. As you brush, gently encourage the slices to open.
- Roast again, then salt into the fans: Return to the oven and roast 15 minutes. Remove and baste with the rest of the butter. Sprinkle the remaining 1/2 tsp salt from 8 to 10 inches above the potatoes so it falls between slices. If using herbs and garlic, stir them into this final butter before basting so they do not burn.
- Finish roasting: Roast 10 to 15 minutes more, until the edges are deeply golden and crisp and a knife slides into the center with little resistance. Total roast time is usually 50 to 60 minutes depending on potato size.
- Serve: Rest 3 to 5 minutes, then finish with flaky salt if you like. Serve hot.
Notes
Slice thickness: Aim for about 1/8-inch. If your cuts are thicker, expect less “fan” action and add a few extra minutes of roasting.
Garlic timing: Add garlic only in the final basting butter to avoid bitterness from scorching.
Make-ahead slicing: You can slice the potatoes a few hours ahead and store submerged in cold water. Drain and dry extremely well before roasting.